DDM Guild Repaint April 2010: Skeletal Tiefling
Megan Smith, a valued community artist and Chapter Master in Brisbane, Australia, brings us number thirteen in her series of monthly DDM Guild Repaints. Up this month: the Skeletal Tiefling from Monster Manual: Savage Encounters. Instead of repeating the same intro every month, we decided to compile it into a single introduction article. With that behind us, we can immediately skip right to repainting!
Instructions
Paint needed: Mithril Silver Paint, Asurmen Blue Wash (from Citadel/Games Workshop)
Normal Painting supplies: paintbrush, water for rinsing the brush, paper towel.
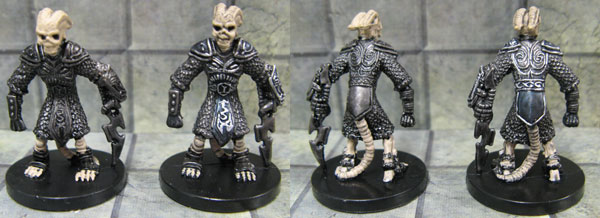
The detail on the armour of the Skeletal Tiefling is amazing, this month’s repaint will make it more visible. Painting the detail looks much more difficult than it actually is (there’s a bit of a trick to it).
Steps
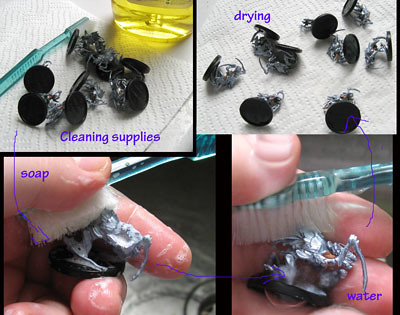
1. Clean your minis
Wash your hands first, then scrub each mini with a toothbrush, using warm water and dishwashing liquid. Then, scrub again with just the warm water to make sure there’s no oil, soap, or anything weird on the surface of the mini. Throw them onto a paper towel a couple of times to knock off most of the water, and then leave them to dry.
2. Wash with Asurmen Blue
- Shake the bottle of Asurmen Blue wash, then open it carefully.
- Dip your brush in your rinsing water and brush it gently on the paper towel to remove the excess water.
- Dip the tip of your brush into the wash, paint the sections of armour we are going to accent the details on. (The shoulders, around the face on the chest, the belt, the pieces hanging from the belt, and the wrist guard). See the picture for more guidance. Basically, the wash is to darken those sections, so that the bright silver details show up better.
- Once they are all painted, leave them to dry (20-60 minutes, depending on the weather).
3. Paint the details with Mithril Silver
- Shake the bottle of paint, then open it carefully.
- Dip your brush in the rinsing water and brush it gently on the paper towel to remove excess water.
- Dip the tip of your brush into the paint, then brush any extra off on the side of the pot (or the lid). Carefully, using the side of the brush, rather than the point, apply paint to all the raised details. You’ll find it easiest to get a feel for it if you start with the edges of the shoulder plates, and the back of the skirt. It’s not as difficult as it sounds.
- When the brush becomes too clogged, rinse it out and remove the extra water before getting more paint.
- Don’t worry if it’s not perfect, even some details done with a fine, bright line will look good.
- The face on the wristguard may not exist on your mini (it’s clear on about half of mine), just do your best with what you have.
- If there are any bits that look terrible, you can re-wash that section, and start again.
- Leave the minis for 5-10 minutes to dry (exact time will depend on the weather).

Use your Guild Logo Stamp on the bottoms of the bases, and then you are … finished! Please tell us about your Guild Repaints. Post a picture in Crafter’s Corner on Hordelings and tell us how many you’ve painted and given away. See you next month!

Comments
19 November 2013
10 years 19 weeks
10 December 2013
10 years 12 weeks